InfluxDB Cloud Native Collectors, Enterprise and Industrial IoT Examples - Part 2
By
Jay Clifford /
Product, Use Cases
Oct 14, 2022
Navigate to:
Learn how to deploy InfluxDB Cloud’s Native Collectors with Kepware and the Things Network.
In Part 1 of the blog series, we discussed connecting Kepware to InfluxDB using the new InfluxDB Cloud feature Native Collectors!
As promised, let’s now discuss how to connect an Enterprise IoT platform, The Things Network to InfluxDB. Before we get to the juicy tutorial let’s run through a quick reminder.
A quick reminder:
In short, Native Collectors allow users to spin up collectors for well-known industry protocols which allow you to connect, ingest, and parse data into InfluxDB. The first native protocol to be released is MQTT!
Our architecture diagram:

Our learning objectives for each part of the blog series:
| Kepware (Part 1) | Things Network (Part 2) |
|
|
The Things Network - enterprise example
The Things Network is a global collaborative Internet of Things ecosystem that creates networks, devices, and solutions using LoRaWAN. More specifically The Things Network runs The Things Stack Community Edition, which is a crowdsourced, open and decentralized LoRaWAN network. The Things Stack provides its own MQTT broker allowing third-party systems to collect device data. In a previous blog, we used Telegraf to ingest and parse the payload to InfluxDB Cloud which required us to host Telegraf. In this case, we will use Native Collectors to provide a full cloud-only solution.
Let’s start by collecting the connection credentials required to connect InfluxDB Cloud to The Things Network:
- Open your Things Stack console and select MQTT from Integrations.
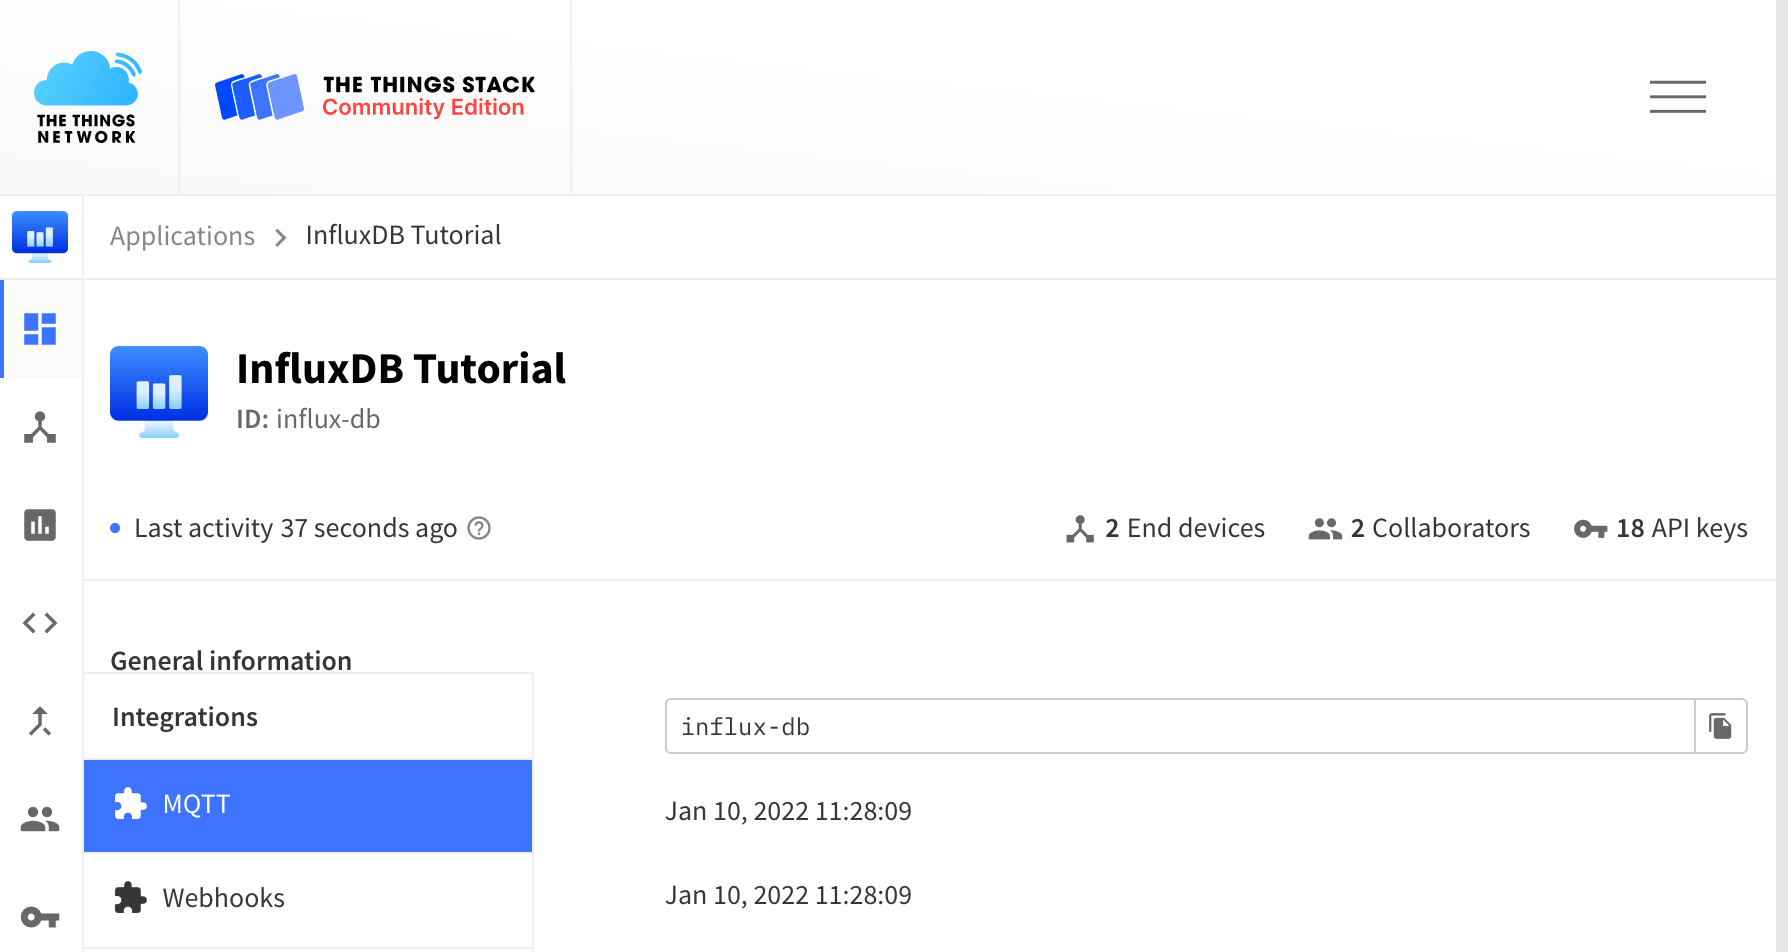
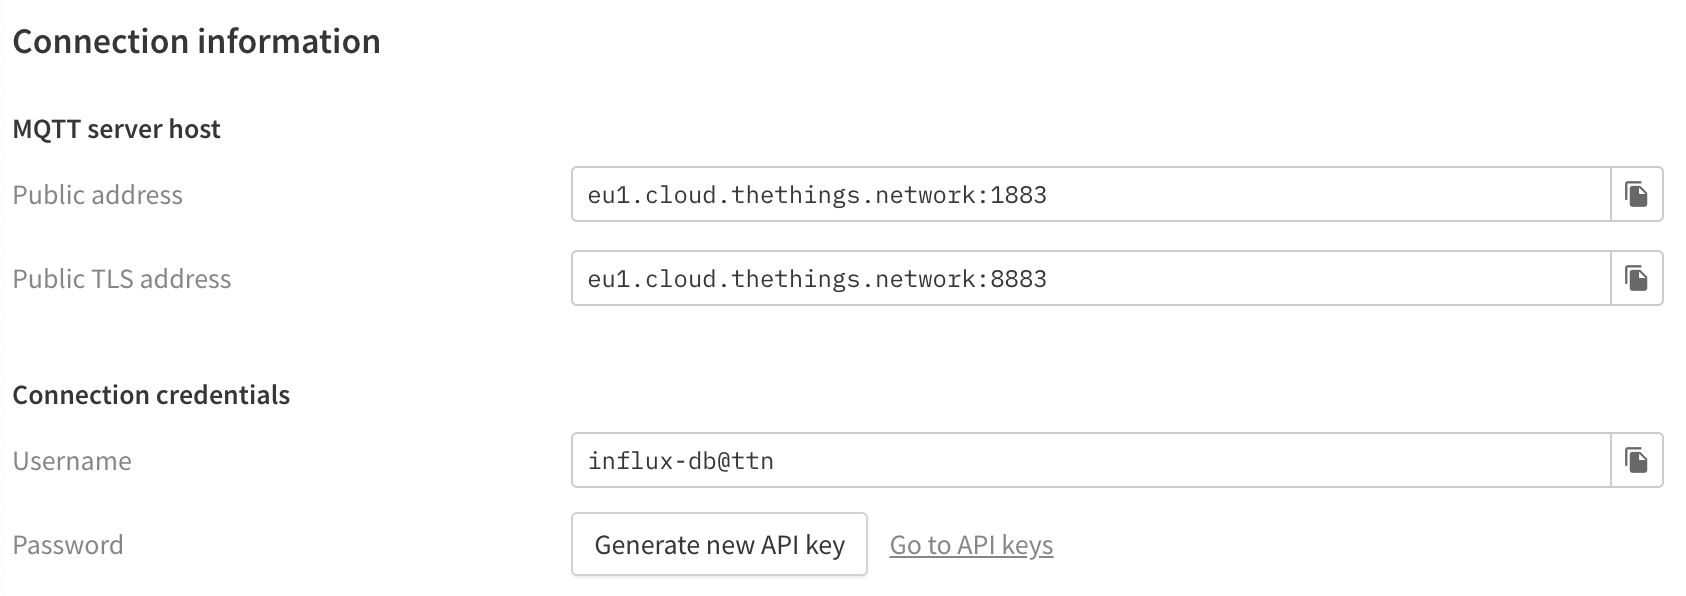
- Take note of the following (here is an example of mine):
- MQTT server host and port: eu1.cloud.thethings.network:1883
- Username: influx-db@ttn
- Password: click Generate new API key


That is us finished within The Things Stack Console. Let’s open InfluxDB Cloud and create our Native Collector:
-
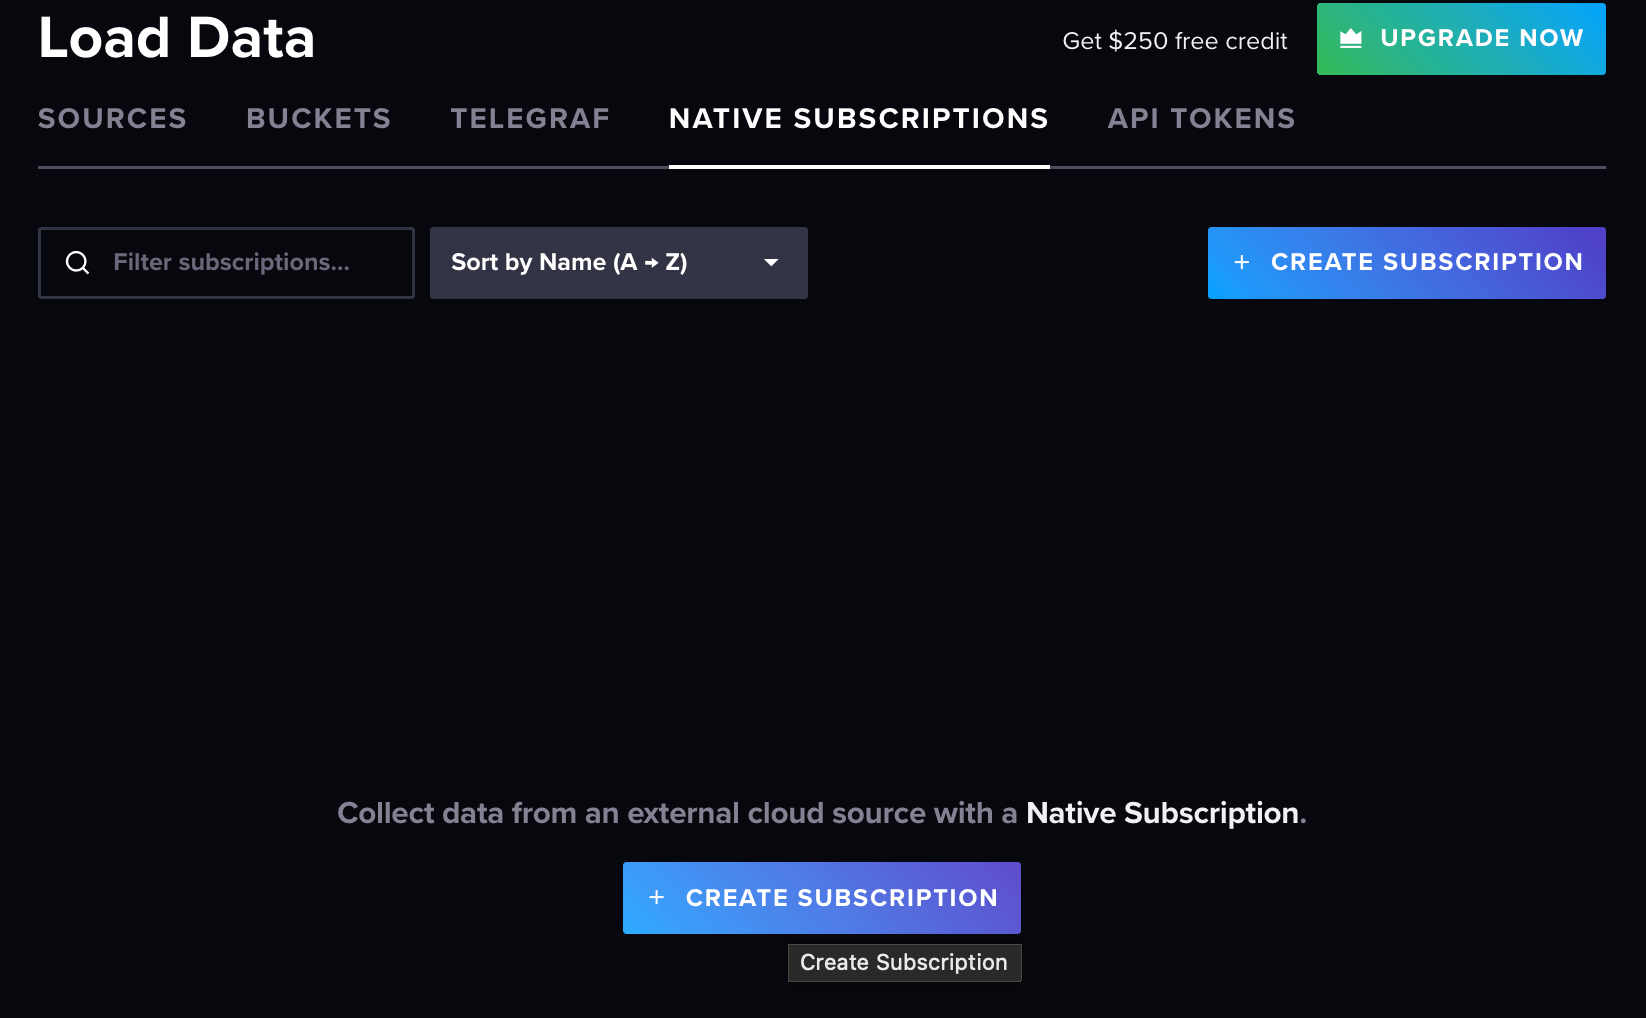
Select Native Subscriptions and select Create Subscription.
-
Start by connecting to the broker. Define a subscription name and optionally a description. Next, provide your hostname / IP and port of The Things Stack broker.
eu1.cloud.thethings.network:1883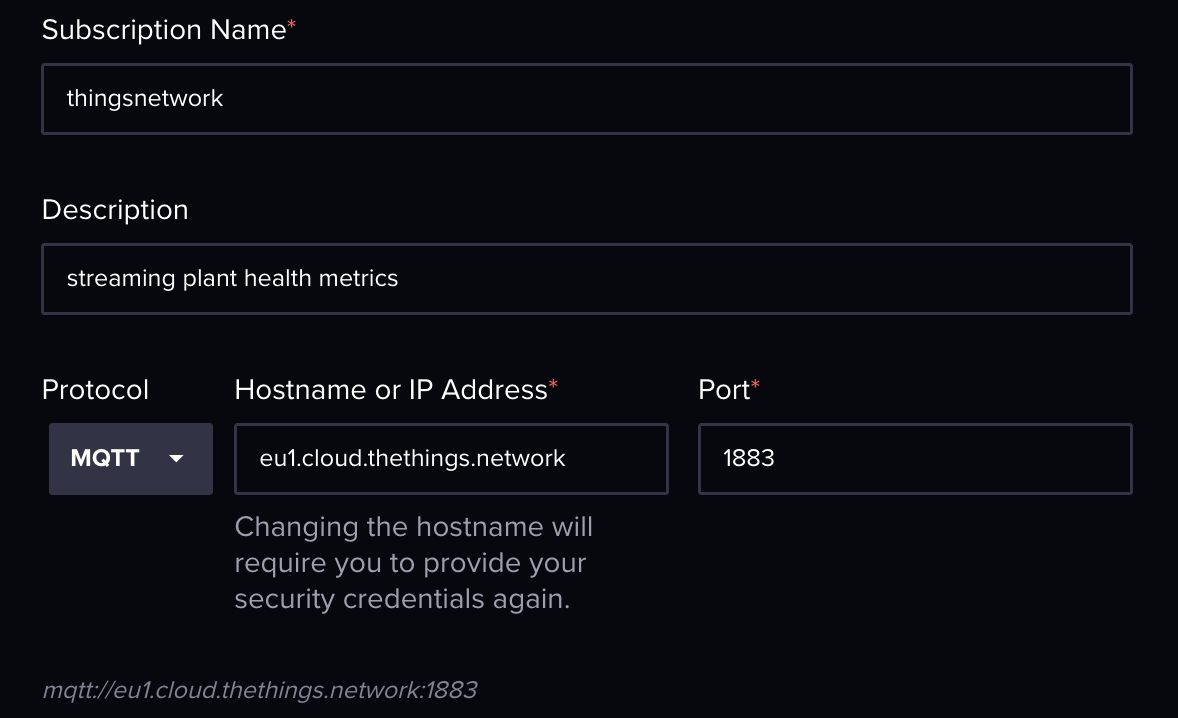
-
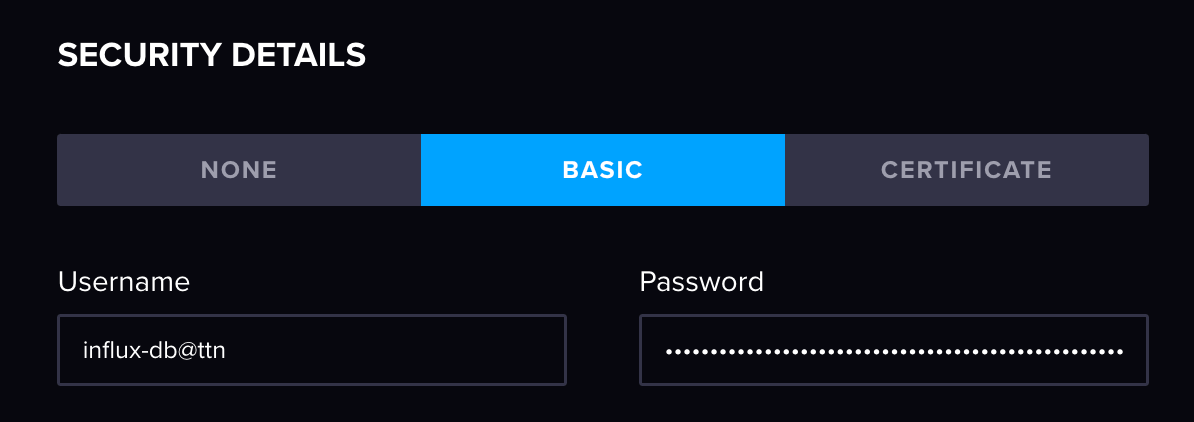
Next, we will define our security credentials to connect our Native MQTT Collector to the Things Stack MQTT broker. Toggle on Basic and enter your Username and Password.
-
The Things Stack defines its own topic structure for devices. The topic to a device looks like this:
We could quite happily use this as our Topic path. However, this does not future-proof our solution. Suppose we add a new device to our Things Stack platform. This means another Collector would need to be generated in InfluxDB to read from this device as well since eui-############ will be unique to each device. Instead, we can use wildcards to collect from all child topics under a parent. In our case it would look like this:v3/influx-db@ttn/devices/eui-333437396e378c0d/up
This means any topic that falls underneath this parent will be subscribed to. If we only cared about the up topic for any devices, we could also use the following wild card notation:v3/influx-db@ttn/devices/#
In our case, we will stick with the #.v3/influx-db@ttn/devices/+/up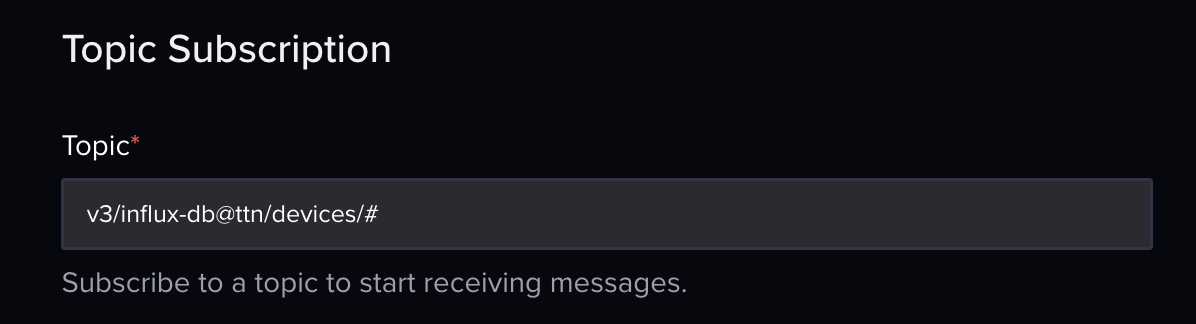
-
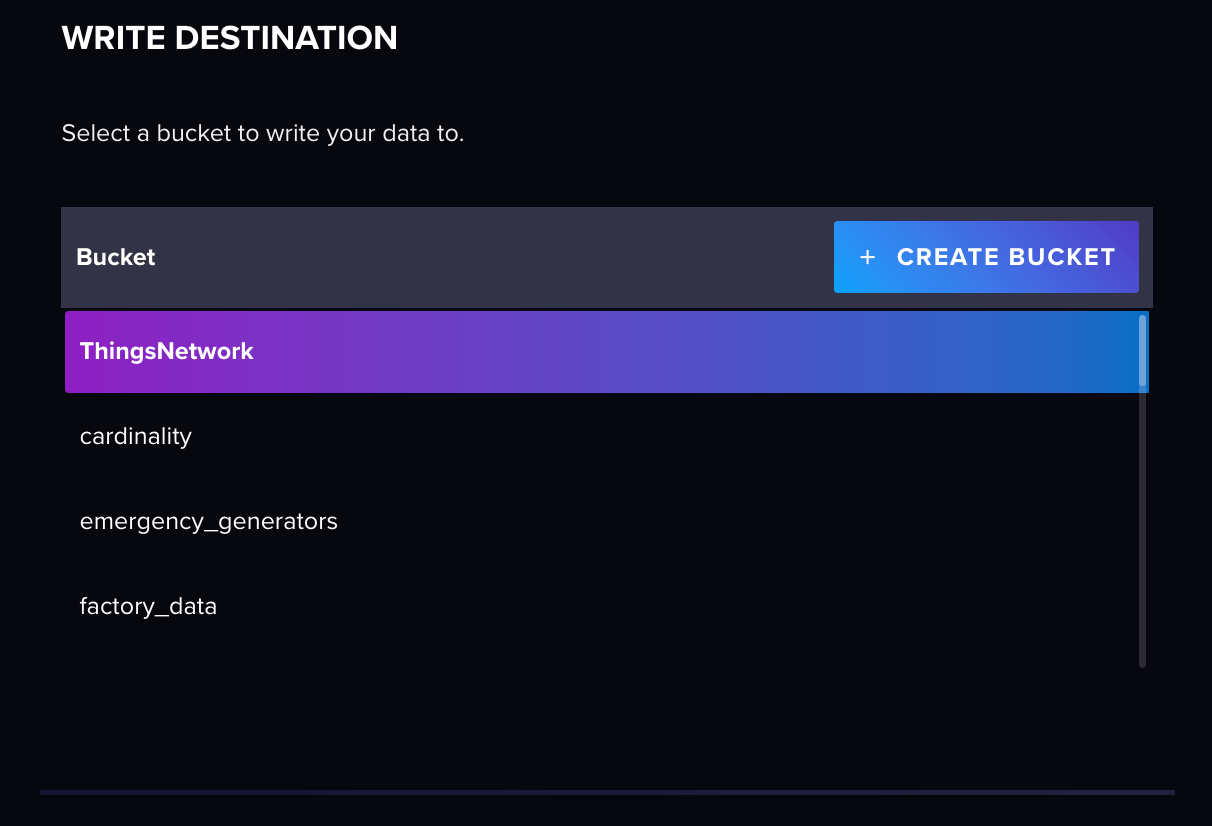
Select or create a bucket to write data to:
-
Now for the main event parsing our JSON payload. So let’s start by toggling to the JSON parser.
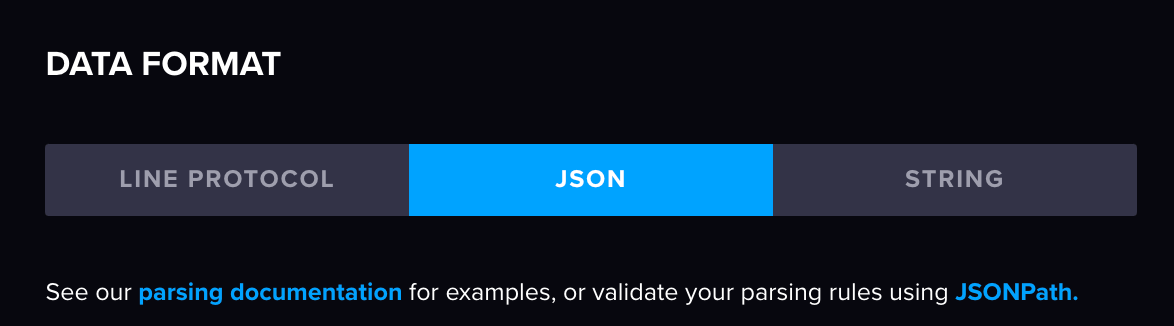 We are also going to define a static measurement name (this can also be selected from the payload if desired).
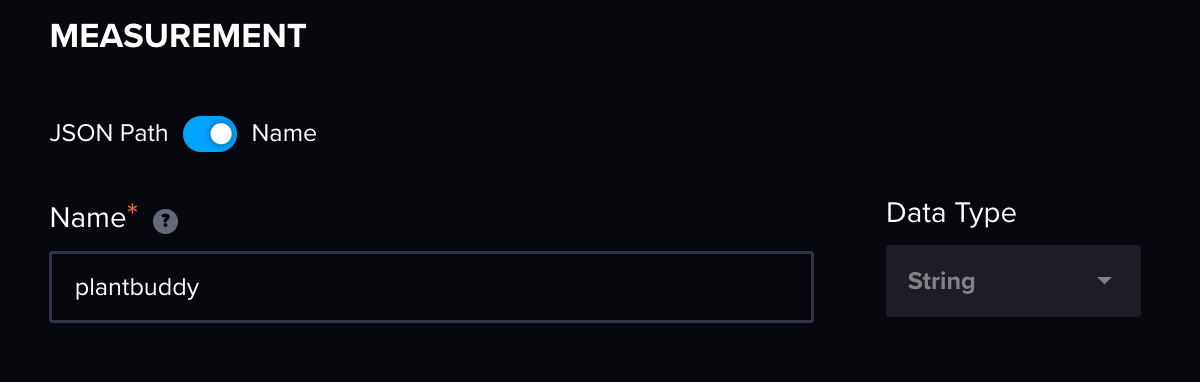 Now onto parsing the payload. To do this, let’s first take a look at the full payload:
As you can see the payload is massive with most of it being a lot of metadata around device and network connectivity. Luckily our JSON parser allows you to map which parts of the payload are important and the rest is automatically ignored. In this case, we will map the following:JSON { "end_device_ids":{ "device_id":"eui-333437396e378c0d", "application_ids":{ "application_id":"influx-db" }, "dev_eui":"333437396E378C0D", "join_eui":"2345434567534678", "dev_addr":"260B1121" }, "correlation_ids":[ "as:up:01GB7FGZ7C7YPAN35YN9RWPW21", "gs:conn:01GB5B6P06KAZN9GGDJ0E7SJ4Q", "gs:up:host:01GB5B6P0AWVV7ZQ1SWX662Q94", "gs:uplink:01GB7FGZ0W64Q9RSA7GDW3984C", "ns:uplink:01GB7FGZ0XF15C35FNFXY94J87", "rpc:/ttn.lorawan.v3.GsNs/HandleUplink:01GB7FGZ0XCMMYBFAHXWBPE8RN", "rpc:/ttn.lorawan.v3.NsAs/HandleUplink:01GB7FGZ7BV2MEXT4SK9BVYM4E" ], "received_at":"2022-08-24T08:29:27.660421379Z", "uplink_message":{ "session_key_id":"AYLGS2QyVZvMoUKEi30aNA==", "f_port":3, "f_cnt":1924, "frm_payload":"NC0yMS02My0yMS0yMAA=", "decoded_payload":{ "payload":{ "air_temperature":21, "humidity":63, "light":20, "soil_moisture":4, "soil_temperature":21 } }, "rx_metadata":[ { "gateway_ids":{ "gateway_id":"jay-home-gateway", "eui":"58A0CBFFFE804AF4" }, "time":"2022-08-24T08:29:27.471081018Z", "timestamp":2919447700, "rssi":-55, "channel_rssi":-55, "snr":9.5, "uplink_token":"Ch4KHAoQamF5LWhvbWUtZ2F0ZXdheRIIWKDL//6ASvQQlPmM8AoaDAjnwpeYBhCnmuHXASCgxJLl+6QQKgwI58KXmAYQusDQ4AE=", "received_at":"2022-08-24T08:29:27.398380957Z" } ], "settings":{ "data_rate":{ "lora":{ "bandwidth":125000, "spreading_factor":7 } }, "coding_rate":"4/5", "frequency":"867900000", "timestamp":2919447700, "time":"2022-08-24T08:29:27.471081018Z" }, "received_at":"2022-08-24T08:29:27.453546835Z", "confirmed":true, "consumed_airtime":"0.066816s", "locations":{ "user":{ "latitude":55.946754, "longitude":-3.219497, "altitude":1, "source":"SOURCE_REGISTRY" } }, "version_ids":{ "brand_id":"arduino", "model_id":"mkr-wan-1310", "hardware_version":"1.0", "firmware_version":"1.2.3", "band_id":"EU_863_870" }, "network_ids":{ "net_id":"000013", "tenant_id":"ttn", "cluster_id":"eu1", "cluster_address":"eu1.cloud.thethings.network" } } }- payload (the key values in this object will be our fields)
- device_id (this will represent a tag within InfluxDB
Let’s start by parsing the tag: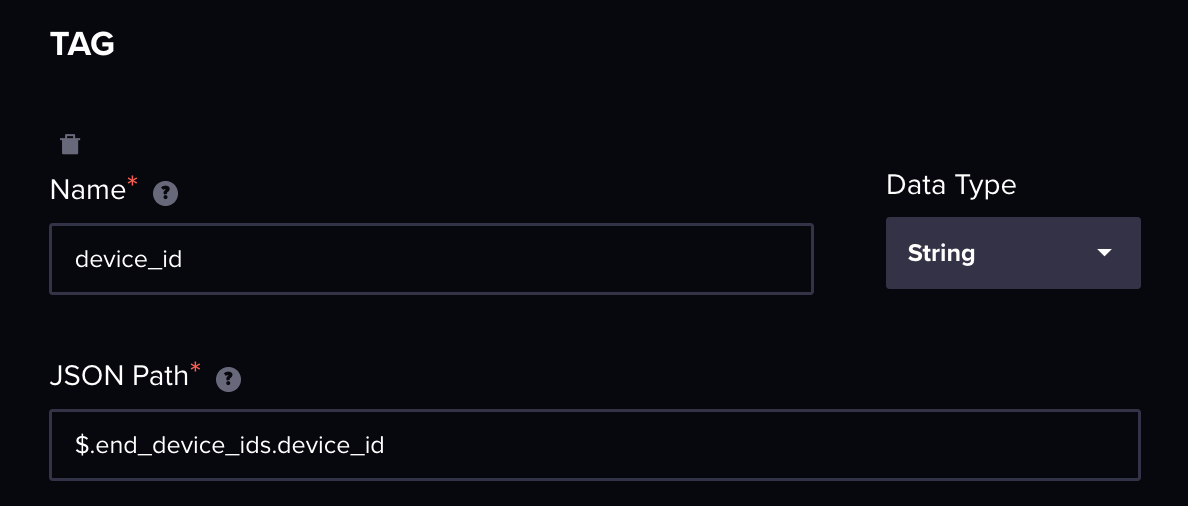 As you can see in the above screenshot, we have defined a name to represent our tag key and then we have supplied the JSON path to our device_id to fill the tag value. The best way to test your JSON pathing is to use a JSON pathway playground like Jayway.
We also define our fields currently in the same way: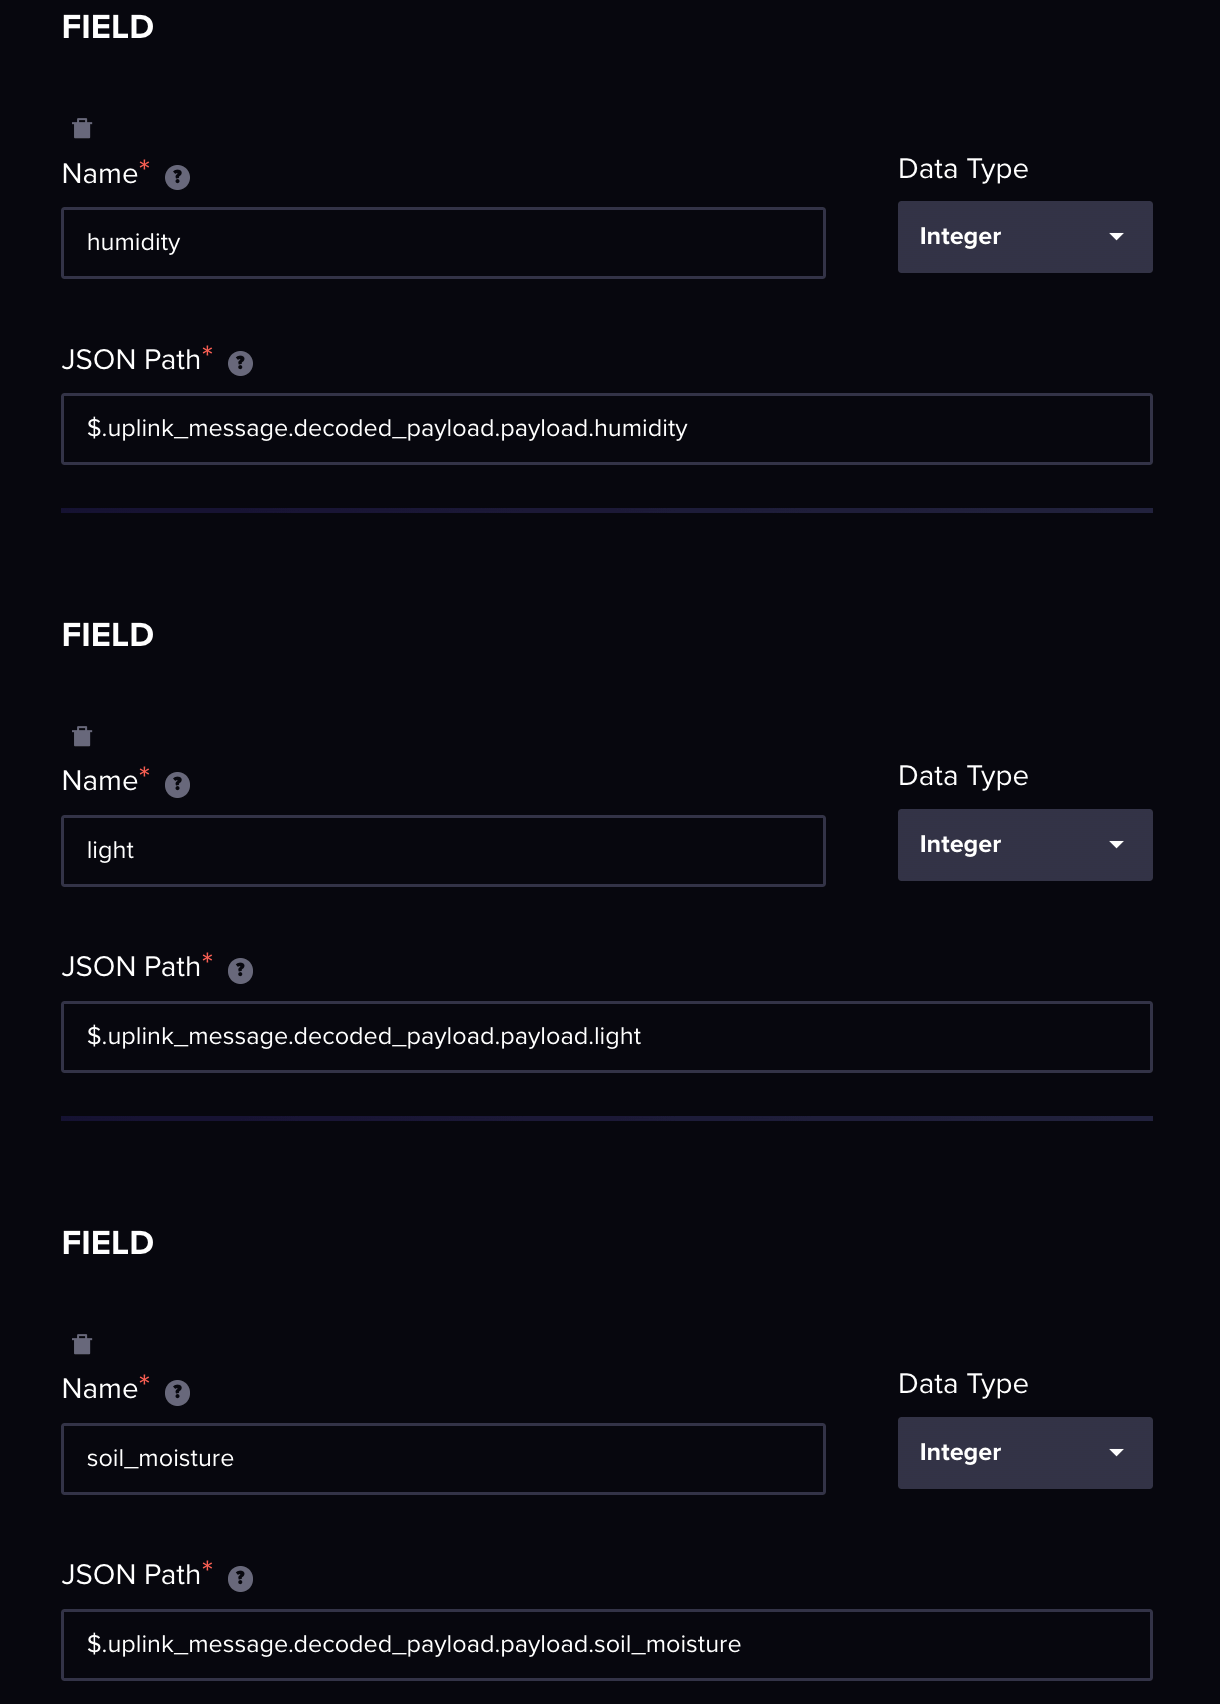 In the future, we will be adding more sophisticated ways to parse JSON objects rather than defining each field specifically.
-
Select Save Subscription.


 We are also going to define a static measurement name (this can also be selected from the payload if desired).
 Now onto parsing the payload. To do this, let’s first take a look at the full payload:
 As you can see in the above screenshot, we have defined a name to represent our tag key and then we have supplied the JSON path to our device_id to fill the tag value. The best way to test your JSON pathing is to use a JSON pathway playground like
  In the future, we will be adding more sophisticated ways to parse JSON objects rather than defining each field specifically.
Top trick: If you select your newly created Native Collector and click the button in the far right corner called View Data, you will be able to open a notebook which contains a view of your MQTT payload data as well as any subscription error data.
And we are finished! We have successfully connected and authenticated against the Things Stack’s MQTT broker, parsed our device JSON payload from The Things Stack into InfluxDB, and future-proofed our topic subscription with wildcards.
The Things Network parsing table
If you wish to parse more of The Things Network payload, here is a reference table and my schema suggestions:
| InfluxDB Element | JSON Path | Data Type | Field / Tag |
| application_id | $.end_device_ids.application_ids.application_id | String | Tag |
| f_port | $.uplink_message.f_port | Integer | Field |
| f_cnt | $.uplink_message.f_cnt | Integer | Field |
| gateway_id | $.uplink_message.rx_metadata[0].gateway_ids.gateway_id | String | Tag |
| rssi | $.uplink_message.rx_metadata[0].rssi | Integer | Field |
| snr | $.uplink_message.rx_metadata[0].snr | Integer | Field |
| consumed_airtime | $.uplink_message.consumed_airtime | String | Field |
| latitude | $.uplink_message.locations.user.latitude | Float | Field |
| longitude | $.uplink_message.locations.user.longitude | Float | Field |
Conclusion
I hope these two platform guides give you the confidence to experiment with the new Native Collector feature of InfluxDB Cloud. We are currently looking for community feedback to help improve the MQTT Collector as well as ideas for new protocol types you would like to see. To continue the conversation, come join us on Slack and the forums. Share your thoughts. I look forward to seeing you there!
